Equipment Inspection and Testing
Non-destructive testing (NDT) is an efficient way to inspect equipment because there is no damage or intrusion to the surface of the equipment. The purpose of non-destructive testing is to detect, identify or measure the presence of certain elements like rouging, pitting, surface cracks, sub surface cracks, or anomalies in the base material.
Allegheny Surface Technology can help you avoid the potential for catastrophic consequences and financial losses with early detection of problems before they cause damage, operating inefficiencies or in-service failures. Through our advanced NDT solutions, we can verify that the equipment is in compliance with all applicable standards.

| Service | Description | Benefits | Application Scenarios |
|---|---|---|---|
| Visual Inspection (VT) | The process of examining a component or piece of equipment with the naked eye to find flaws. |
|
Improper weld height, suck back, surface cracks, surface porosity, undercut, and corrosion. |
| Profilometer | A calibrated device used to measure the surface roughness of the material. |
|
Visual imperfections to the surface are verified to be within standard operating roughness average. |
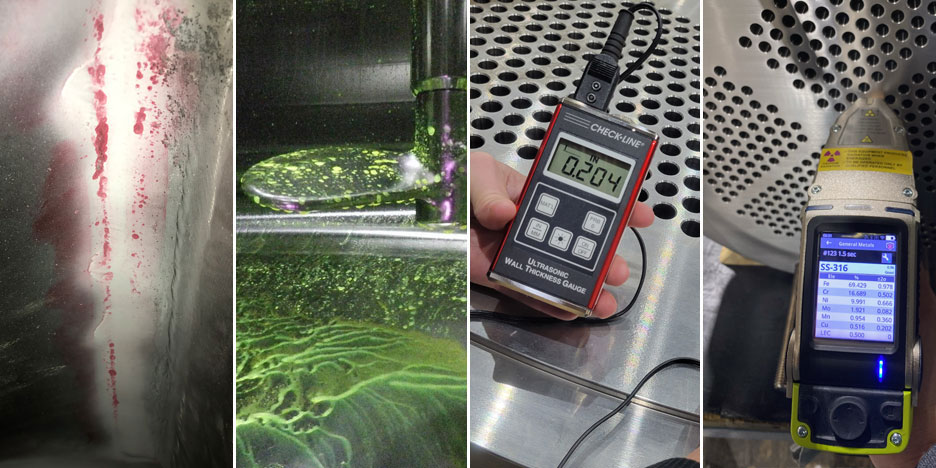
| Penetrant Testing (PT) | Involves applying a low-viscosity penetrant liquid over the tested asset. The liquid is allowed to seep in through cracks and pores. Once the liquid seeps in, the inspector cleans the surface and applies a developer liquid on the same surface. Applying this developer causes the penetrant liquid to rise to the surface, revealing the flaw. |
|
Fatigue cracks, grinding cracks, quench cracks, impact fractures, overload fractures, pitting and weld discontinuities. |
| Ultrasonic Thickness Testing (UTT) | Determines material thickness and measures the thickness of coatings and/or linings. |
|
Material thickness, lining thickness, corrosion loss, coating thickness, and wall measurements. |
| Hydrostatic Pressure Testing | Used to assess the structural integrity of compressed gas cylinders, boilers, tubing, pipelines, and pressurized vessels. It’s performed by filling the system with water, pressurizing to a level greater than Maximum Allowable Working Pressure (MAWP), and monitoring for deformation or failure during a specified amount of time. |
|
Tests for any leaks of weld repair. Leaks caused by pinholes or weld cracking. Commonly done after repairs and downtime to determine if items will operate properly when put back into use. |
| Positive Material Identification Testing (PMI) | Method for verifying the chemical composition of metals and alloys. Can be used to verify that supplied materials conform to the proper standards and specifications. |
|
Checks and verifies material composition. For example 304 stainless steel vs 316 stainless steel. |
| Riboflavin Testing | Used to evaluate the cleaning effectiveness of spray balls. It identifies blind spots of the equipment created by shadows due to agitator, baffles, nozzles, mechanical fittings, etc. |
|
Ensures the sprayballs are capable of applying cleaning solutions onto and over difficult to clean surfaces. These could include baffles, mixer and agitator blades including underside surfaces, access ports, and certain tank nozzles that have potentially narrow angular spaces due to instrumentation. |
